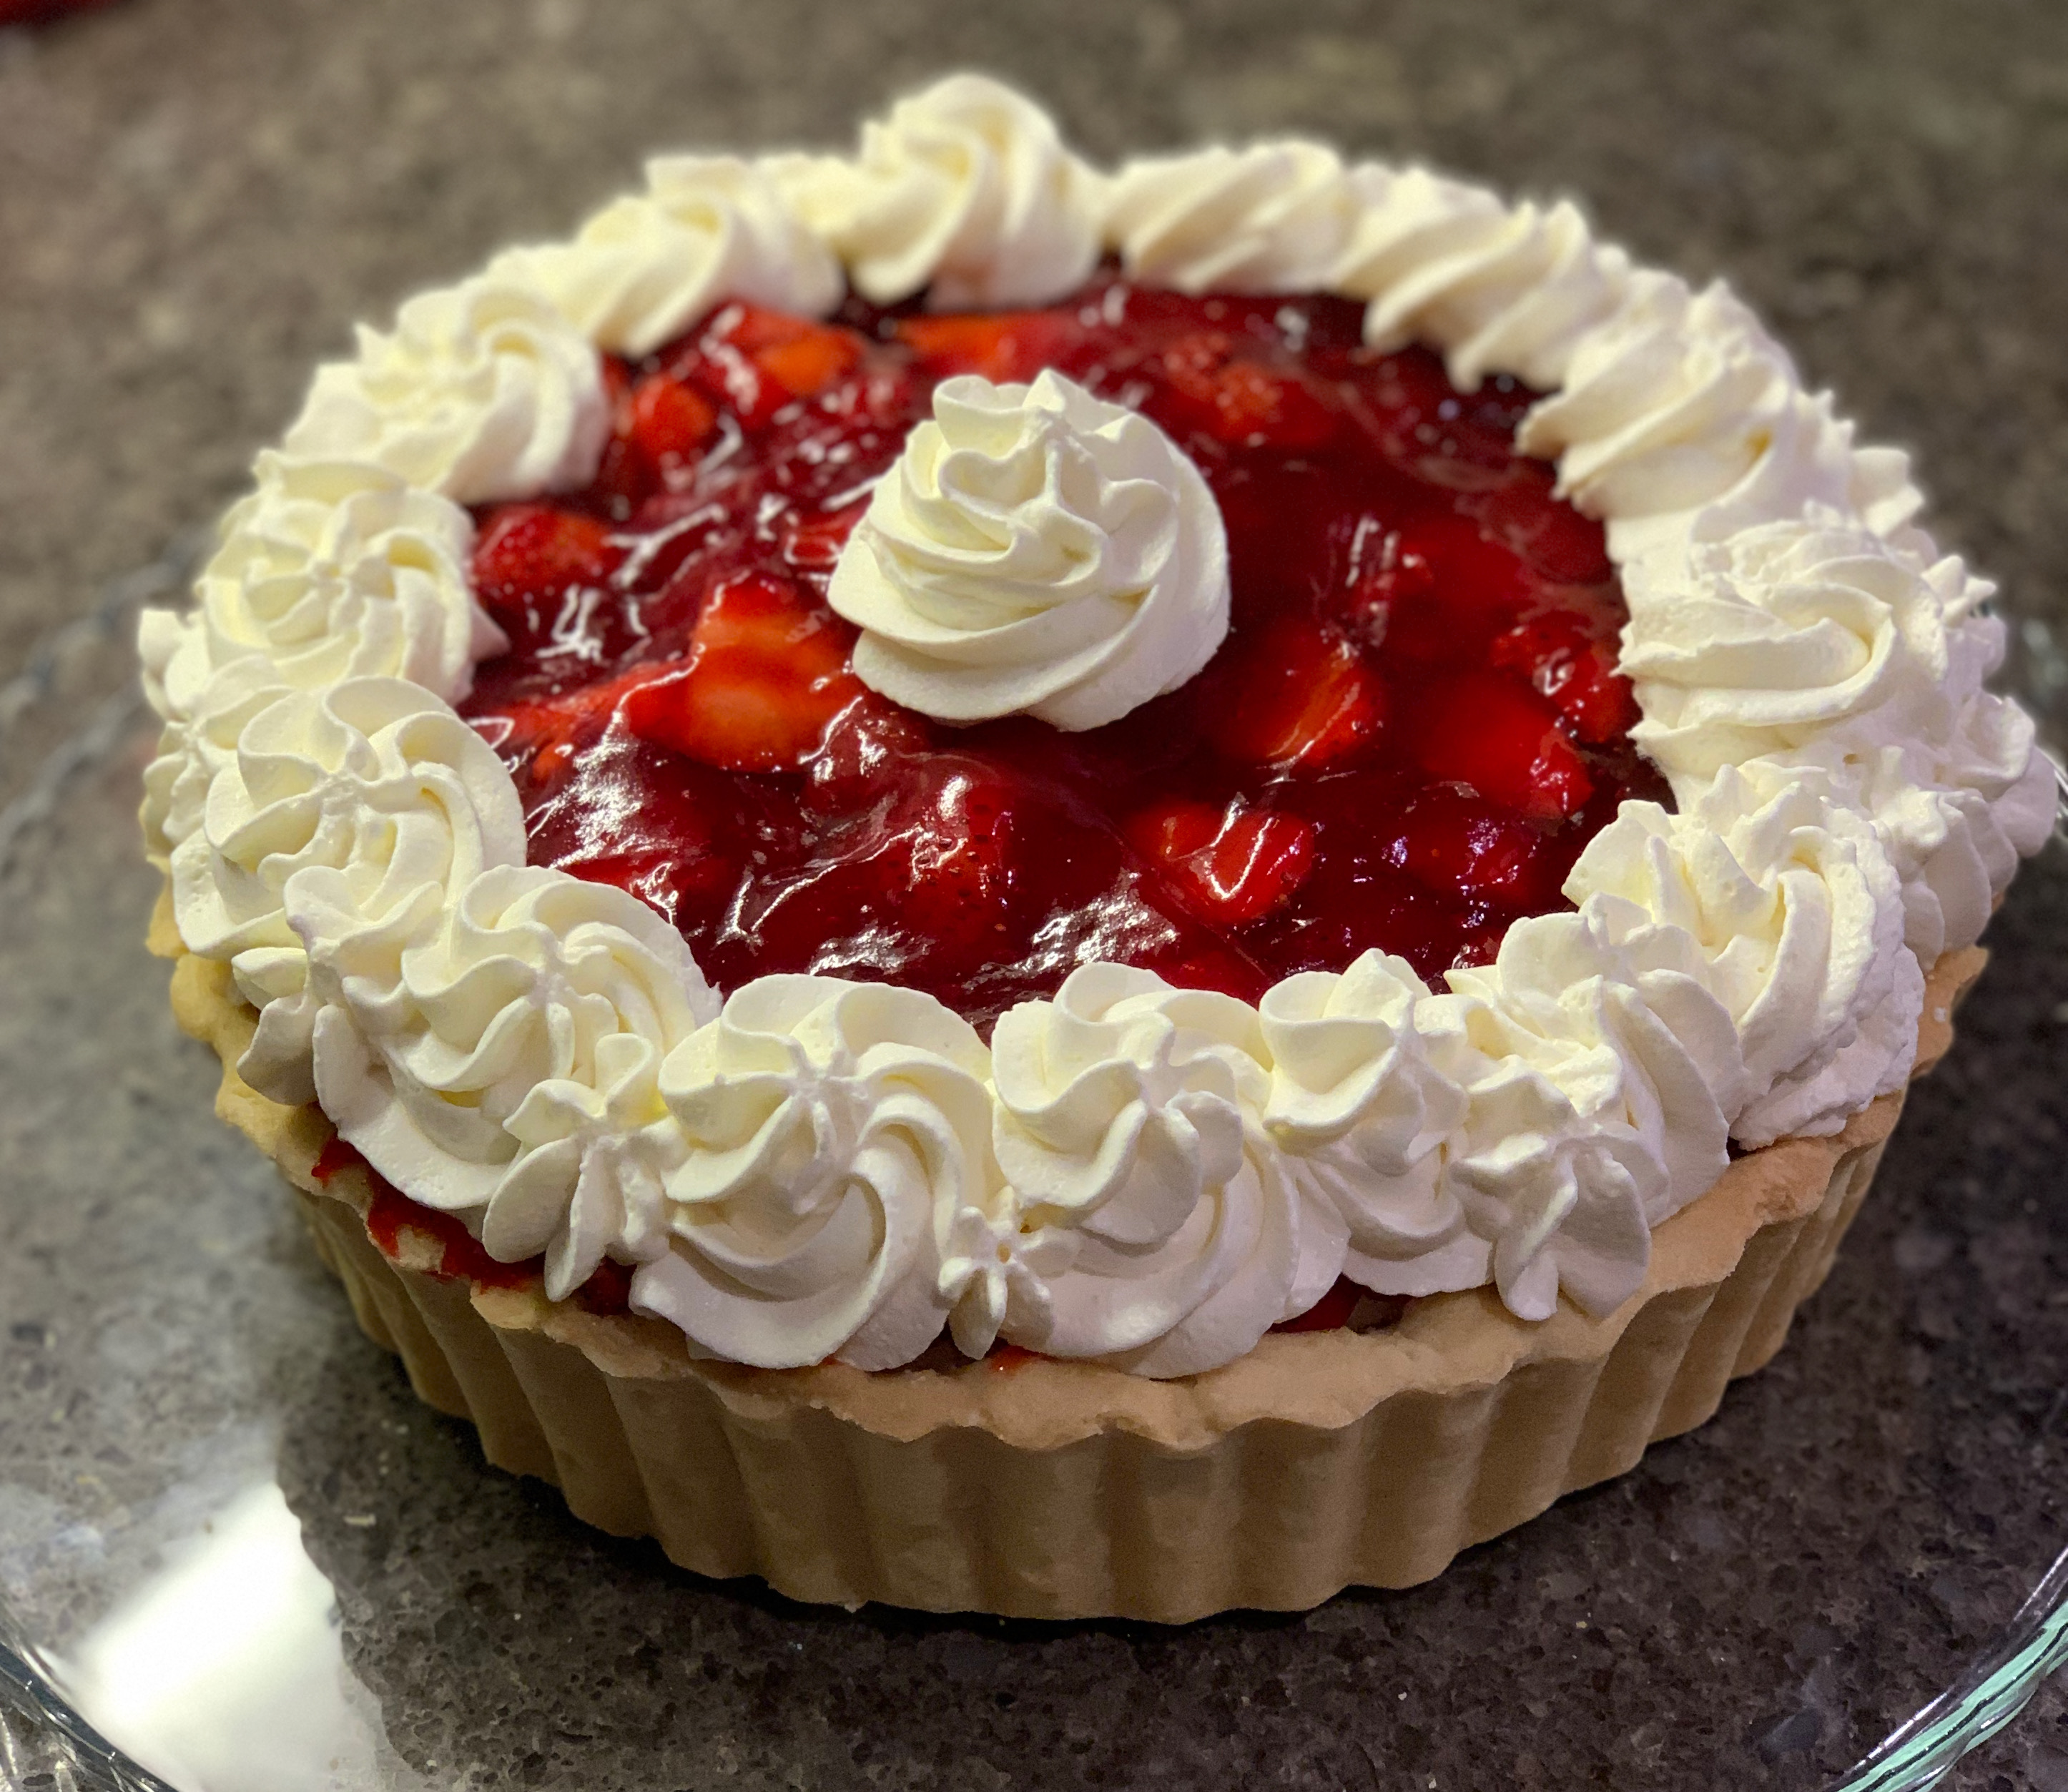
Strawberry and cream tart

First off… yes, I know this should be called a “flan” and not a “tart” (the difference is on the size, flan is big, tart is small), but I flat out refuse to call this a flan. To me, a flan is a custard and nothing will change my mind. So I’m calling this a tart while it technically isn’t. But who cares about technicalities.
I’ve tried many different recipies for strawberry tart over the years. My go-to was a recipe for strawberry mini tarts that were cute but were only good right after making. The whipped cream always turned gooey after the first day.
There is a bakery in Buenos Aires, a couple of blocks away from my in-law’s home that makes this beautiful and delicious strawberry tart that we used to get for every celebratory occasion. The crust is thick and crumbly, it has a generous layer of whipped cream inside and a lot of strawberries, glazed with a strawberry-flavoured jelly, and it’s topped with the most beautifully silky whipped cream swirls. It’s just perfect.
Seb challenged me to replicate it. And I tried, working striclty from memory because it’s been over 2 years since the last time I had had it. It turned out pretty good!
My biggest challenge was to figure out how to get the whipped cream hold its shape. Every time I made whipped cream, it became soupy after a while. I found out that the trick is to stabilize the cream. I used unflavoured gelatin and it worked wonderfully.
I also had to figure out how to have the crust to come out nice and crumbly, just how I remembered it. After doing some research, I came to the conclusion that I had to go with a pâte sablée dough, so I ended up using my lemon meringue pie dough recipe.
Ingredients
Crust
- 100g powdered sugar
- 200g room-temperature butter
- 300g all-purpose flour
- 1 egg
- Pinch of salt
Filling
- 500g fresh strawberries
- 1 red glaze envelope
- 3/4 cup sugar
- 3/4 cup boiling hot water
Chantilly
- 2 cups fresh whipping cream
- 8 tbsp powdered sugar
- 2 tsp vanilla extract
- 2 1/2 tbsp (1 envelope) unflavoured gelatin
- 2 tbsp water
Directions
- In the bowl of a standing mixer, beat the butter slowly until soft and creamy. Add the powdered sugar slowly, and then increase the speed.
- When the consistency becomes creamy and the colour lightens, add the egg and keep mixing.
- Add the flour and salt, and mix slowly until a firm dough forms. Do not overmix.
- Form a circle with the dough and cover with plastic wrap. Take to the fridge to rest for at least 30 minutes.
- Once chilled, roll the dough in a floured surface. Cover the pie dish and press against the side. Try to use all the dough, this layer needs to be thich. Tap base with a fork.
- Cover the dish and dough with aluminium foil and press. Add baking weights.
- Take to a pre-heated 350°F oven for about 15 minutes. After that time, remove the weights and foil, and cook for 5 more minutes. Let cool after taking out of the oven.
- While the dough bakes, chill the standing mixer’s bowl (use a metal one if possible), alongside the mixer’s whip attachment, for at least 15 minutes.
- Prepare the gelatin by mixing the powder with the water in a microwave-safe bowl. Let it sit for a couple of minutes, until the granules stretch. Heat in the microwave for 5-10 seconds until the gelatin liquifies. Set aside.
- Start whipping the cream. Once thick, slowly incorporate the sugar. Once mixed, incorporate the vanilla extract. Once soft peaks form, incorporate the gelatin as the cream beats in a thin stream. Continue beating, keeking an eye on it, until stiff peaks form.
- Transfer chantilly to a decorating bag. Use about 2/3 of the chantilly to fill the crust. Chill the rest of the cream.
- Wash and remove stems from the strawberries. Cut them in slices. Lay the around 2/3 of the slices over the cream layer.
- Mix the red glaze with the sugar in a big bowl and incorporate the boiling water, 1/4 cup at a time. Mix well until desired thickness forms. Add the rest of the strawberry slices to the glaze and mix well.
- Cover the pie with the glazed strawberry slices, ensuring the entire pie is covered. Chill for at least one hour before decoratinh.
- Using the piping bag with a star tip, decorate the pie with the remaining chantilly. Chill for at least 1 more hour before serving.


